I’ve seen zipper pouches made a few different ways. The first one I made was using Noodlehead’s Lil Cutie Pouch tutorial. It’s cute and is a great tutorial but I wanted to try one with covered zipper ends to see if I could get rid of the funky corners.
So I decided to try it out. I found a few tutorials on how to cover the end of the zipper and each one is slightly different. I sort of combined the tutorials and came up with my own way. It didn’t work out the best so you probably shouldn’t follow what I did.
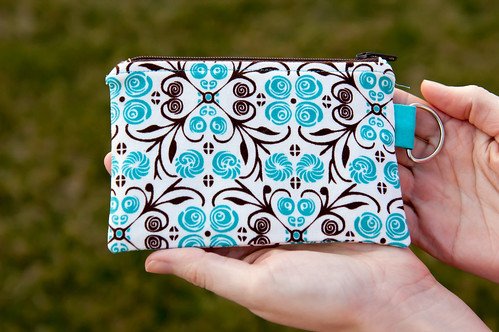
I liked the size of the Lil Cutie Pouch so I used similar dimensions…6 1/4 x 4 1/4, with zip ends of 2 x 2, and I cut the zipper to 6 1/4. I now realize to reduce bulk in the top corner seams you probably want to cut the zipper shorter than the top. One of the tutorials did do this but I didn’t follow that part of it. Lesson learned!
I covered the ends of the zipper by folding in the ends of the 2 x 2 piece by 1/4” and then folding in half. I then attached it to the zipper like in this tutorial. From there I followed the Lil Cutie Pouch tutorial.
This tutorial suggests to push the zipper toward the lining when sewing the lining to the outside. But the other two tutorials suggest pushing it toward the outer fabric. So I guess do what works best for you. I can’t say either is better.
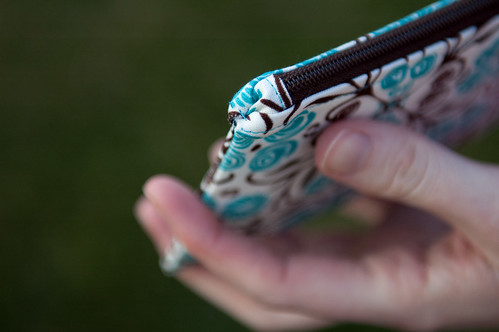
As you can see in the picture, the ends don’t look nice at all and my stitching is coming loose. ICK! I think next time, I will cut the zipper shorter than the length of the pouch and then make the zipper cover long enough so that when sewn onto the zipper, it extends the zipper to be as long as the pouch length. Other than that, it doesn’t look a ton different than the Lil Cutie Pouch.
Do you cover the ends of your zipper for pouches like this? Do you have any suggestions to make it look better?


2 Responses
There is really only one solution to the dented in corner, and that’s to not have the zip (or anything) go all the way to the edge. There’s a couple ways to go about it.
If you want to use covered ends, get Michelle’s pattern here: http://www.keykaloupatterns.com/product/zip-clutch-pdf-sewing-pattern
The way I figured out and have been doing it lately is to get that zip far away from the seams like this: http://www.flickr.com/photos/yorkiemischief/6527611941/in/photostream
I don’t have a pattern for that one yet, but it’s next on my list. If you want to test it when I’m finished with it, let me know 🙂
I’ve also done a hybrid of those techniques too and it works really well.
There are other ways of doing it, you see them ‘out there’, it’s just that the same methods – uncovered or covered zip, get re-circulated round and round. No one is actually solving the problem and telling us how they did it. I’ve found that if you don’t have too much of the zip width in the seam ( so you get more of the colourful zip showing – quite a nice design feature), rather than stitching along the teeth edge as closely as you can, then you don’t have so much bulk in the seams and they turn pretty squarely and nicely.
On the link where you say ‘one of the tutorials did do this’, this is actually a different method and one which you may like. I did it yesterday and the corners are the squarest ever. The difference is that you don’t put the ends of those zip covers in the seam allowance. No, you sew as near to them as possible but they are free. That means there is no bulk in the seam at all and the end of the zip covers are also totally square. In fact the zip covers are completely unstitched at the outer end which you only notice if you peer at it and doesn’t seem odd at all. In fact I think I’ve seen purchased pouches very similar and also those which don’t even sew the zip cover across the inner edge – it’s kept in place by the stitches sewing in the zip.
For such a little thing, the zippered pouch is a pretty complex thing!