Did you remember that I have a free pattern for a hooded towel? Well, I’ve added on to it a few times to make it cuter and wanted to share how I did it. I’m going to do the tutorial making a monster, and then will randomly share pattern pieces for other options.
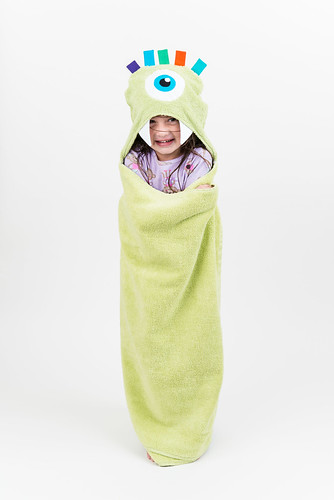
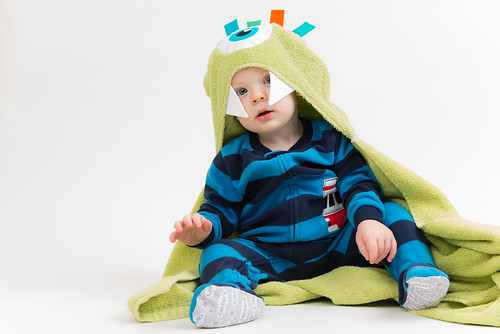
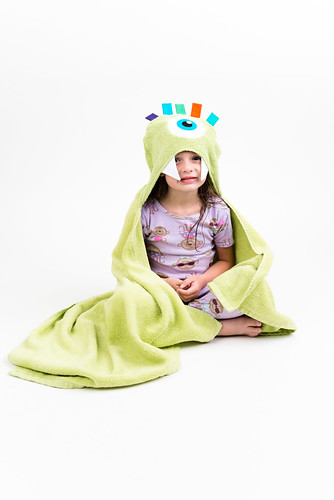
I made the monster hooded towel for Owen because he outgrew the baby hooded towels very quickly. What is awesome about the ones that I make is that even Lillian can still use them because I use a regular size bath towel. So really, an adult could probably use them….might be kind of odd though.
Are you ready to get started?
Supplies
- Bath Towel (I really like the Target ones because of how soft they are)
- Hand Towel for the hood
- Quilter’s cotton (amount/colors vary depending on what you want your monster to look like)
- Thread (I use Mara 100 and Maxi-Lock Serger Thread from Wawak (discount code at bottom of post))
- Heat’n Bond Lite (it has to be lite so you can sew over it)
Prep Your Pieces
Go ahead and download the pattern pieces for the hooded towel and for the monster pieces. To start out, cut out the towels the same way as directed in the hooded towel post.
Next, iron the Heat’n Bond Lite onto the back of your eye fabrics, following the iron settings on the package. Then, trace the pattern pieces onto the back of the Heat’n Bond Lite and cut it out. I like to do it this way because it’s easier than trying to iron on the Heat’n Bond Lite onto the fabric when they are both the same shape and size. Less room for error this way; plus I don’t get the adhesive on my iron.
Cut out the monster hair and teeth out of quilter’s cotton. I chose to use a different color for each piece of hair, but you can let your imagination run wild. You can also do more or less hair pieces and more or less teeth. It all depends on the look that you are going for.
Sew the Monster Pieces
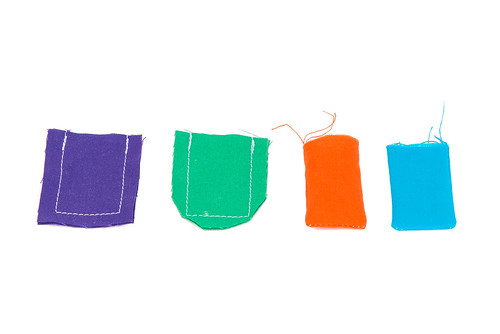
Using a 1/4″ seam allowance, sew together the hair pieces with right sides together on one short side and both long sides (the purple fabric). Next, trim your corners (green fabric). Then, turn right side out (orange fabric) and iron flat (blue fabric). Repeat with all of your hair pieces.
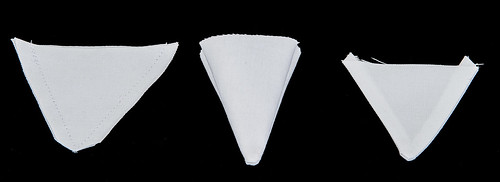
Now do the same thing with your teeth pieces….sew with right sides together on the two long sides using a 1/4″ seam allowance. Trim your corner, turn right side out, press flat.
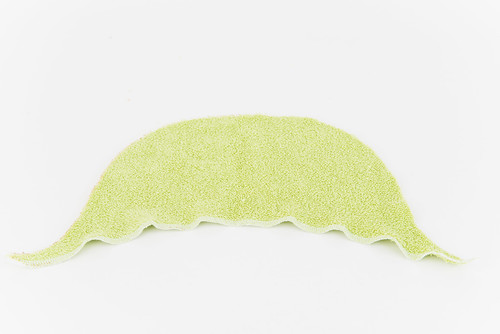
Overlock or serge the bottom edge of the front hood piece. You could also go ahead and sew on the teeth, but I prefer to do that in a later step.
Applique the Eye
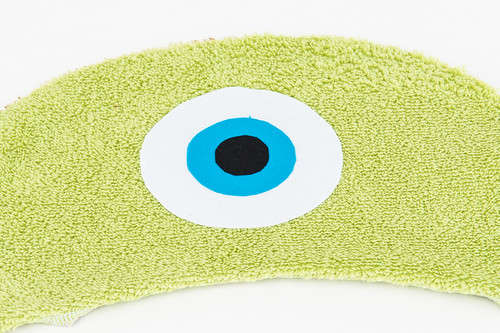
You should already have the Heat’n Bond Lite ironed on to each eye piece. Now you want to iron each eye piece onto the front towel piece. Start with the largest circle (white) and iron onto the towel piece according to the directions on the package. Don’t forget to take the backing off first or it won’t stick….I forget at least once every time I’m appliqueing something.
Since each circle (other than the highlight in the eye) is a decent size smaller than the last one, you can go ahead and iron all three on and then sew. If they overlapped at all, you would want to sew each one and then iron the next one over the top.
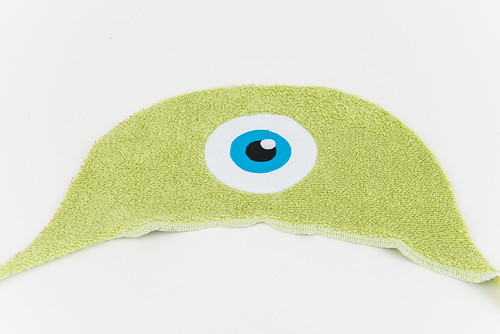
Once the three circles are ironed on, go ahead and begin sewing around the edge with the same color thread as the circle that you are sewing. That way you can’t really see your sewing. There are different choices for stitches when appliqueing so find what you like and write it down for future reference. I prefer a blanket stitch, which on my machine is stitch 39 and I widen it to about 2.5.
Once you have the three larger circles appliqued on, iron on your eye highlight and stitch around it.
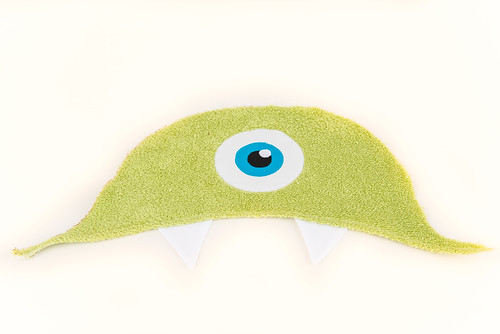
Now your eye is complete.
Attach the Teeth and Hair
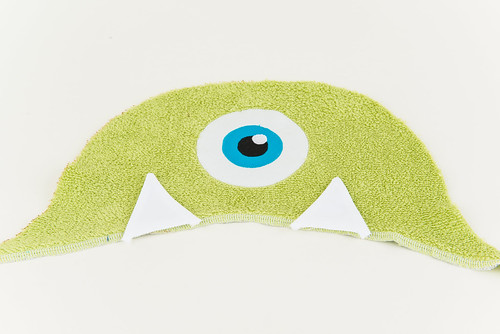
Now get your teeth pieces and place them with raw edge down and even with the overlocked/serged edge of the hood piece. Sew along the edge to attach the teeth.
Iron the overlocked/serged edge toward the back of the front towel piece and sew in place. You are essentially hemming the edge.
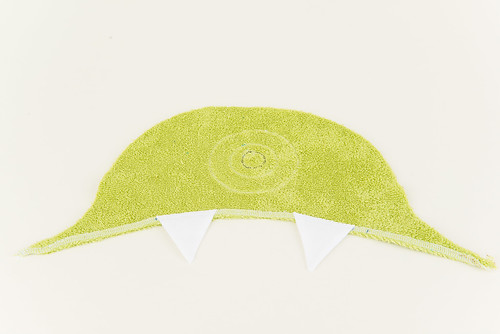
When doing this, your teeth should now be facing down and the raw edge should be toward the back.
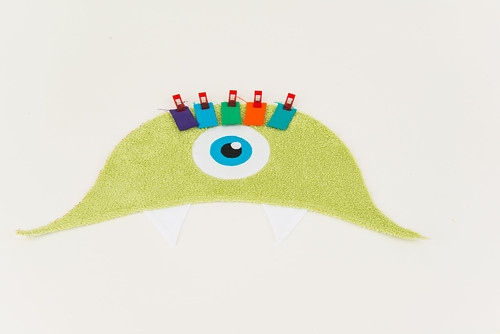
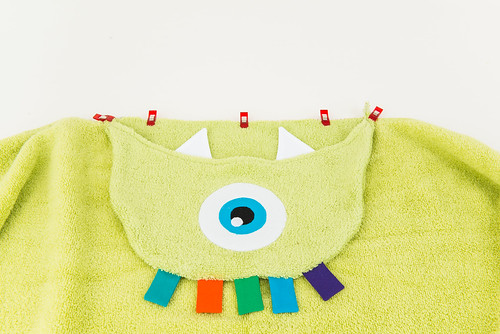
Put your hair pieces facing down with raw edge against the raw edge of the towel like in the above picture.
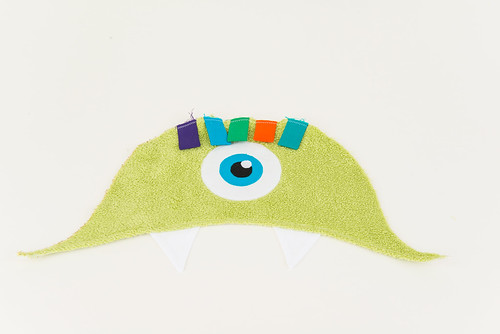
Sew in place with less than a 1/4″ seam allowance.
Assemble the Hood
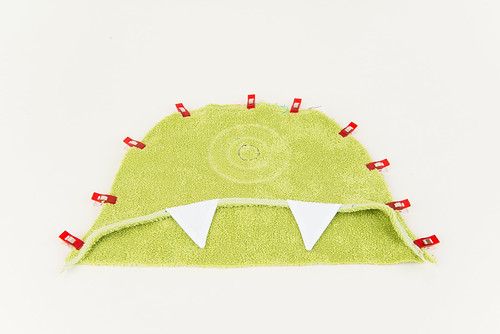
Now pin/clip your two hood towel pieces with right sides together. The hair pieces should be in the middle of the two towels.
Overlock or serge the two pieces together.
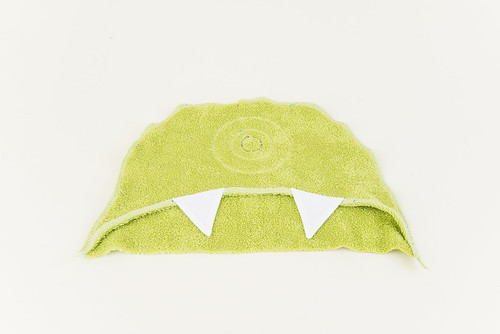
Turn right side out and you can see what your monster looks like. I prefer to iron what I just sewed, but since the towels are so thick, it doesn’t do a whole lot.
Assemble the Towel
Place the back of the hood to the back of your bath towel. Be sure to center it on the long edge of your bath towel. Pin or clip in place and then overlock or serge together.

Iron and then sew down the overlocked/serged edge. That way it looks better and hopefully won’t rub against your child as much.
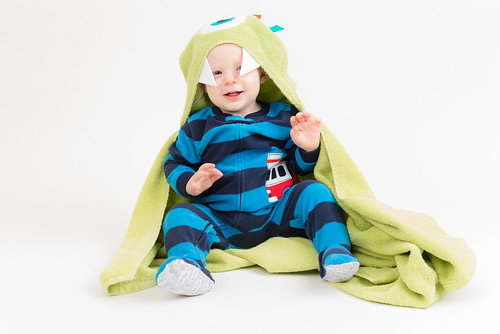
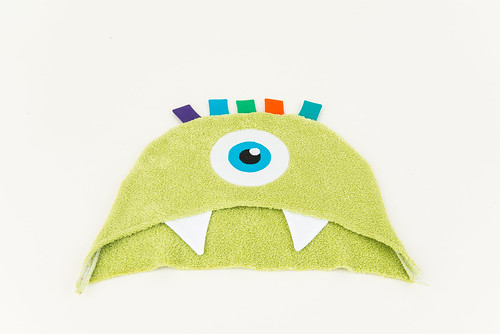
Your monster hooded towel is now done!
Wawak Review
You probably noticed that I mentioned Wawak above. They are a company that I have been purchasing from for a few years now. I started out just buying serger thread and now I buy all of my thread from there. The Gutermann Mara 100 is great quality and there are so many colors to choose from, that it can actually be difficult to decide on a color! I did purchase the thread color chart so that it would be easier for me, but have also found that I am picking colors that were in a sample pack of Gutermann thread that I purchased shortly after starting to sew.
Since first purchasing from them, I have discovered that they have a lot of the notions that I need for sewing. Which include thread, needles, zippers, elastic, and even things like grommets, which I used for curtains for Owen’s room. They have the brands that I would purchase anyway, and their prices are fantastic so I haven’t been to Jo-Ann Fabrics in a very long time. I tend to prefer to buy items online if you haven’t noticed.
I found out first hand that they have excellent customer service! I was looking to get some cording for a pair of pants that I wanted to make for Lillian. I have never purchased cording so I wasn’t really sure what I was looking for. Anyway, I decided to email them asking the difference between their cotton piping and micro cording. This was after only ordering from them twice, so I wasn’t a well established customer. They saw that I was already a customer and emailed me back stating that they had mailed me a small sample of both the piping and the cording. It was so nice to see the items instead of trying to understand the difference by reading an email.

Now through the end of the year (12/31/2015), you can use promo code WSN1215 to receive 10% off of one order of $50 or more on Wawak.com.
Disclaimer: I am an affiliate of Amazon so I get compensated for any orders placed through the links in this post.
Post Sponsor: Wawak.com (I received a small compensation in order to share Wawak with you, but all opinions are my own.)


