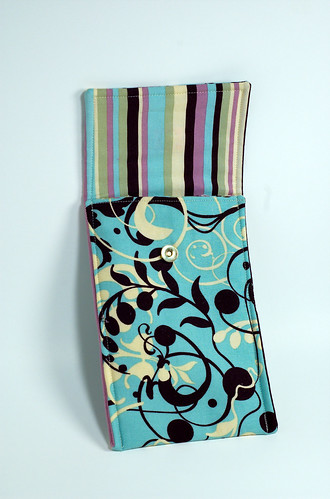
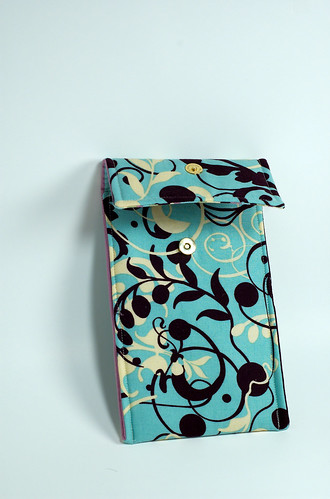
I attempted to make a Kindle case but I could not find a tutorial online for one I liked or for the Kindle 3. So I took a few different ideas from other case type tutorials and attempted it. I used this one to help get the dimensions, and this one as the basis of how I would make the case; both from sewmamasew. The only difference is that I wanted to use a magnetic snap instead of a button.
I used this tutorial from craftapple blog to do the magnetic snap. I practiced multiple times to try to get the buttonholes perfect for the snap and even used the memory on my machine to save the automatic buttonhole. The snaps worked out perfectly except I apparently wasn’t thinking when I attached them because the one on the flap is on the wrong side! So it can’t snap because both are on the top side of the fabric.
I am pretty disappointed in myself because it was a stupid mistake and easily could have been prevented. The only other thing about it is that it is too small so the Kindle doesn’t fit anyway. I guess that makes me not as mad since the case can’t be used because of the size and my major mistake.
Details
On to the details of the Kindle case. I measured my pieces to be 20.5 X 6 but I think if I make this exact case again I will make them 20.5 X 6.5. I also used a thick interfacing which I will use again, but I will attach it to the lining material instead of the outside material. That way the Kindle is protected more.
Since I used the snaps, the lower one (the correctly placed one) has the back of the snap toward the kindle. If the interfacing is on the inside fabric then the snap won’t be an issue with rubbing against the Kindle.
I also am not sure about top stitching. It could be the thick interfacing or it could just be my lack of experience, but when I top stitch it doesn’t stay in place, and the lining material shows through. So needless to say, I have some more work to do, including research, and thinking about what I want, before I try making another Kindle case.
I said at the beginning of this blog that I was going to post about my mistakes so that others could learn from them. So as much as I didn’t want to admit this mistake, I think I owe it to everyone. So I suggest to triple check (or even more) things before you continue with the next step.


6 Responses
Believe me I’ve made mistakes like that MANY times. The good news is that you *probably* won’t do it again! 🙂
The colors are beautiful and you are almost there. Next time it HAS to be perfect because you know what mistakes you have made, so you know it will be right this time.
I can tell that I am becoming more aware of what I need to do by each project that I tackle. For the very beginning projects I just kind of went through the motions of following the tutorial and got my ending product. Now, I can sometimes figure out the next step before reading it. I did make another one and it turned out much better. 🙂
I am also very new to sewing, I just started in march. I have yet to start and finish a project without any mistakes. I was just about ready to give up when I found a link to your site on a post about learning to sew. You have truly inspired me to keep going and not give up, and that I should be proud of what I made even if it is not perfect. I liked your idea of using the blind hem foot to get close to the edge. I recently started a blog and will start posting all my projects from now on. Thank you
I wanted to thank you for this great read!! I certainly loved every little bit of it.
I have you book-marked to check out new stuff you post…
I absolutely love your blog and find nearly all of your post’s to be just what I’m looking
for. Do you offer guest writers to write content in your case?
I wouldn’t mind writing a post or elaborating on a number of the subjects you write in relation to here.
Again, awesome website!