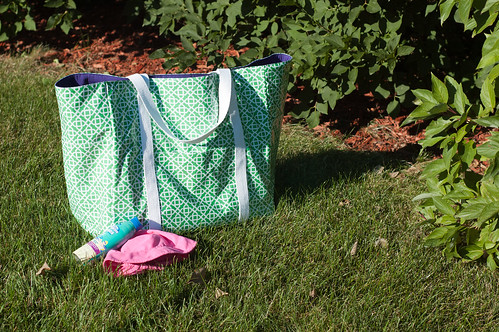
Shortly after I started my blog and joined Twitter, Jennifer Paganelli from Sis Boom contacted me asking if I would like some laminated fabric. How could I turn that offer down! She was generous enough to give me plenty to make a nice size beach bag. Thanks so much Jennifer!
I have had the laminate for a long time…too long actually, but to be honest I was pretty nervous to cut into it and try to sew with it. It’s great quality fabric and I was afraid to completely screw up my project, and the fabric, but I did know that a beach bag was in my future.
Honestly, I really had nothing to worry about! Other than a few differences in the way you use laminate, it wasn’t much harder to sew with than quilting cotton. I don’t know if it was because I used my walking foot but it was so much easier to sew with than when I used iron on vinyl for my toiletry bag.
The hardest part was the fact that I made the bag gigantic which in general makes it harder to sew. The other annoying part was that I didn’t realize that leaving the laminate folded would cause creases so it was a pain to get out those creases.
I researched online to see what I could do since I knew that I couldn’t iron on the laminated side of the fabric. I found a few sites to help….Sis Boom, Amy Butler, and Pink Chalk Studiowere my favorite references. Since each site gave slightly different information I figured I would try different things and see what happened.
I found that using the hottest setting with little steam worked the best. If I used too much steam then the iron seemed to stick to the fabric, but if I didn’t use steam at all, the creases didn’t come out. Remember, all of this is on the back side of the fabric.
Once, it was pretty much ironed out I was able to cut into the fabric. Since you don’t want to fold it, I had to cut each piece individually instead of two pieces at a time. I also found online that you want to cut with the right side up, so that means with the laminated side facing up. Which is how I normally cut out fabric anyway, so this wasn’t any different for me.
Then the easy part was over, now it was time to start sewing. (The nerves increased.) You don’t want to use pins when sewing with laminate because they will leave permanent holes in the fabric. If you absolutely have to use pins then be sure to keep them on the inside of your seam allowance so that the holes won’t show.
Again, using online resources, I found that using black binder clips was a great option. Actually, since the beach bag is a pretty basic shape, I didn’t use binder clips until I was attaching the lining to the outer bag. Instead, I just held the fabric together and sewed slowly so that I could easily adjust everything as I went along.
I did not have an issue with the material sticking but I know that it can be a problem. Through research I have found that a walking foot really helps so that is what I used. If you do not have a walking foot you can also purchase a Teflon foot to help.
Another (and cheaper) way to help would be to put tape on the bottom of the foot and on the top of the plate. This should help to make the fabric glide better instead of stick. I have not tried this so I cannot say for sure if this works. (edit: according to April from Forshee Designs the tape works great!)
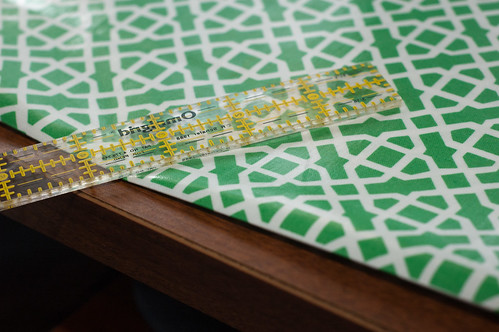
When making the outside pockets, I used my ruler to help flatten the edge since I could not iron it flat. I just ran the edge of the ruler across where I wanted the fold to be. I was then able to top stitch a little easier.
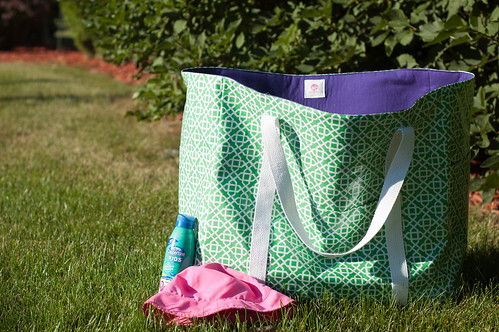
Overall, I am very happy with the beach bag. Working with laminate was definitely more difficult than quilting cotton but not as difficult as I thought it would be. I think you just have to take your time and concentrate on what you are doing.
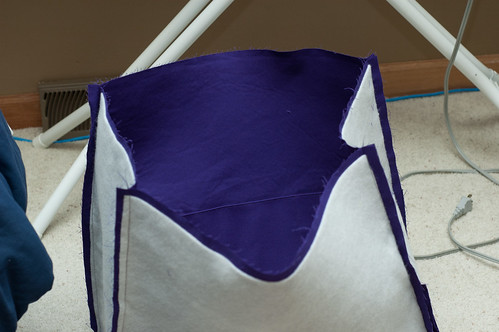
My only complaint about the beach bag is that I made it a little too large so it doesn’t stand up the best. I did use iron on fleece on the lining in order to help the bag stand up a little better. As well as Peltex in the bottom of the bag. I probably could have used Peltex on all of it and it would stand up a little better.
I would definitely suggest trying out laminate if you have a chance.
Linked to Made By You Monday, We Did It Wednesday




7 Responses
The tape on the presser foot works just fine! That’s how I sew with both oilcloth and laminated cotton.
The bag look great! Keep up the good work!
Nice work on the bag! I like the colors- and I can see how working with laminated cotton would be more difficult!
Greetings! I’ve been following your blog for some time now and finally got the bravery to go ahead and give you a shout out from Porter Texas! Just wanted to mention keep up the great work!
Great looking bag. I appreciate the tips for sewing with laminate fabric.
Stunning bag! Do you by any chance have a link to the pattern? Would love to make one myself. Thanks, love reading your posts.