I was a guest blogger over at Imagine Gnats last summer and didn’t post my full tutorial here on my site. By the time I remembered, we were having cooler weather, so I thought waiting until the weather was warming up to post this would work out better. So here is my post on how to upcycle jeans into shorts. The series was called Shorts on the Line.
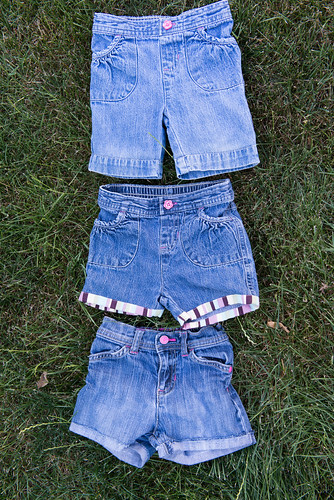
Hi everyone! My name is April and I blog at Sewing Novice. I hope you are enjoying all of the great posts for shorts on the line. I unfortunately couldn’t put my shorts on the line, so shorts in a line will have to do.
My daughter wore holes in her jeans before she outgrew them, so I thought the perfect thing to do would be to make them into shorts. I was just starting to think about how I was going to do this when Rachael emailed me asking if I wanted to do a guest post for shorts on the line. I of course said yes and thought it would be perfect to do mini tutorials for each version.
Supplies
- Jeans
- Jean needle (highly recommended)
- Binding (binding version only)
- Thread
- Scissors
- Pins
- Measuring tape
Keeping the Original Hem
I made one pair by keeping the original hem. I followed the same process as you would use to hem a pair of jeans with keeping the original hem. There is a great step by step tutorial here.
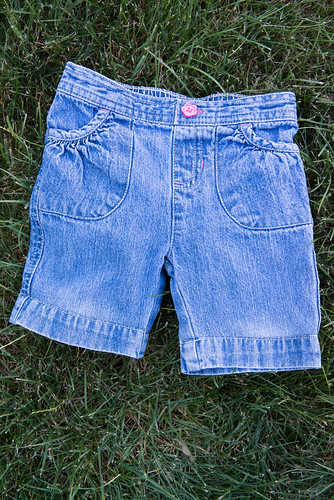
This pair is actually a longer short/capri because the pant legs get a little wider toward the top of the leg, so the hem would have become wrinkled if I made them short enough. This was also the most challenging refashion of all three, but it’s still easy enough for a beginner.
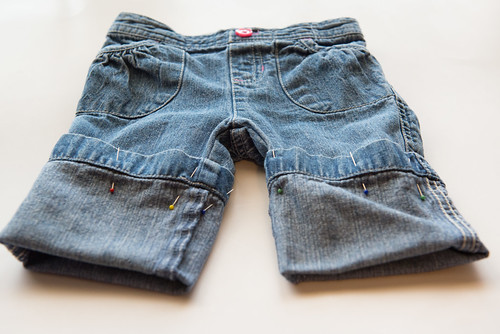
As you can see in the above picture, I folded the bottom of the leg up as much as I could and pinned it in place. I was then going to sew the hem into place, and then check my work before cutting off the excess material.
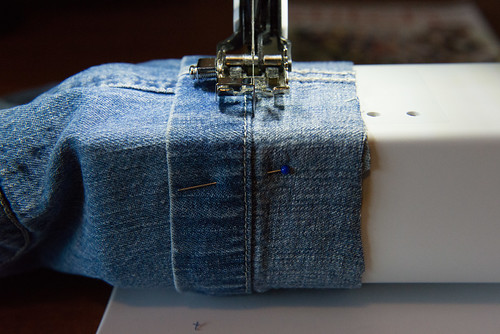
As you can see in this picture, I had to cut the excess off a little first because the pant leg wouldn’t fit on my machine! These are 18 month pants, so I don’t recommend trying this for any pair of pants that are smaller than that.
I could still barely fit the pants on the machine, but I managed and even still had to help the material through. Next, I sewed right up against the original hem. I used my walking foot with my edger plate attached. This would not be necessary, but is definitely helpful.
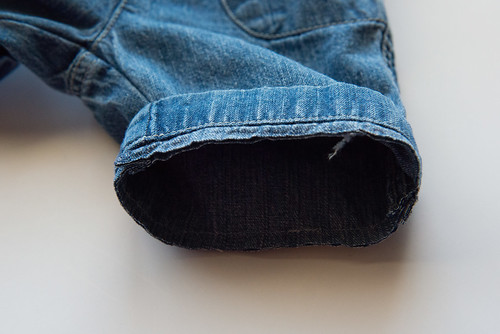
I then unfolded what I just sewed so that I could make sure it looked ok. Once I knew it did, I cut off the excess material leaving about 1/4 of an inch. Then I used an overlock stitch (serger if you have one or zigzag stitch if you don’t have either) to help keep the edge from fraying.
Next, I unfolded them again, and ironed the excess material up toward the waist, being sure to pull the seam apart a little so that it goes as unnoticed as possible. The goal here is to get the seam as flat as possible.
Here is the finished product!
Cutting Off the Legs
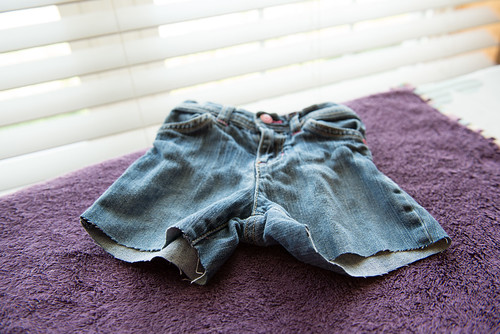
For the next two versions you will first cut off the legs before refashioning. My suggestion for this is to lay the jeans down with the bottom of the legs even. Then measure up from the bottom and cut. This will then account for the extra fabric that is needed in the butt of the jeans. When they are laid down it will seem as if the front is a lot shorter than the back, but again, this is because of the butt.
Frayed Edges
This is the easiest version, but my least favorite. When I first thought about doing this, I was thinking 80’s styles shorts with pockets showing and all the frays hanging down….and that is the exact opposite of what I wanted. I did a little research and found that they are actually kind of in style, or at least I assume since I found that Old Navy carries some similar shorts.
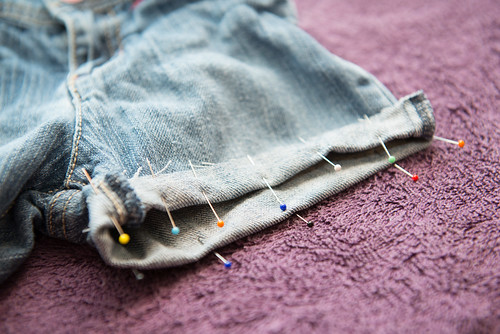
First, cut the shorts about 3/4” longer than the final length that you want the shorts. Fold up similar to the picture above about 3/4” and pin in place. Next, sew with about a 1/2” seam allowance with a small stitch length. The reason I did this was because I didn’t want to take a chance that the fraying would go below my stitching.
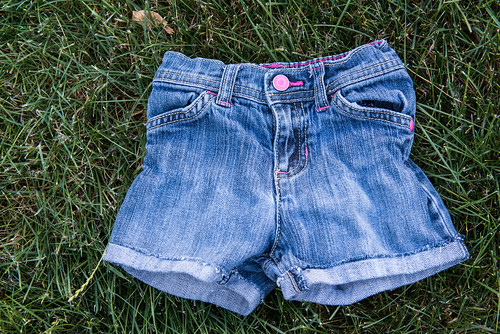
I then pulled threads to make the shorts fray even more and cut off any of the long threads that were now hanging down. I did this a little before and after washing. It formed a fuzzy fray instead of the long whitish threads hanging down.
Binding
This would be my favorite version, but it also takes the most work, especially if you make your own binding. If you do want to make your own binding, but don’t know how, be sure to check out my binding tutorial. You can also use bias tape, but it’s not necessary to actually cut it on the bias. I actually had this binding leftover from another project and am loving it on these shorts!
In order to make these, you need to know how to sew on binding. Check out this tutorial and this one in order to help you get a general idea of how to do it by machine. Each machine is a little different, so you might want to practice on scrap fabric if you have never worked with binding or bias tape before.
I sewed the binding to the inside of the pant leg first, and then folded it toward the outside and sewed from the outside. The reason I did this is because I am not the best at sewing on binding and I knew that doing it this way would look the best. Yes, you see stitching on the binding, but to me, that looks better than to see partial stitching on the jean part and part on the binding.
I hope you enjoyed my versions of refashioning jeans into shorts.





2 Responses