I joined a few Facebook Groups and came across the one for Scientific Seamstress. They were getting ready to have a sew-a-long for the Dana Top and I decided to join in. This was my first shirt that I have ever attempted to make for myself and I’m pretty happy with how it turned out. The fabric I used is Sis Boom West Indies Chandler in Brandy from Hawthorne Threads, but it appears that they no longer carry it.
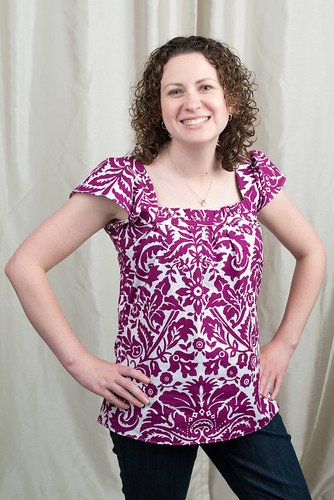
It’s supposed to be a loose fitting top, but a lot of the people in the sew-a-long adjusted theirs so that it wasn’t quite as loose as the pattern shows. I also had to adjust mine and it was the most frustrating part of the pattern.
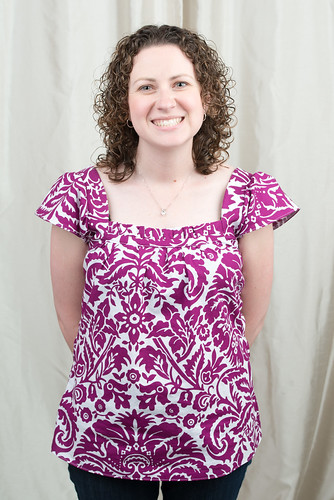
I needed to take it in at the waist, but not at the bust and only a little at the hips. I thought that taking it in at the hips would help, but then it was a little too tight and the waist then stuck out even more. So that seam came out again. I just kept eyeing where I needed to adjust and then I measured enough to make each side even. So basically it was trial and error. Otherwise I would let you know how I adjusted it!

Eventually, I decided that it was good enough to wear and I will try to adjust it again with the next one I make. The other thing I will change is that for joining the two pieces of the sleeves together I will use a larger seam allowance. The sleeves fall down, but with a larger seam allowance (I’m thinking maybe a half inch to an inch) they should be perfect. This of course will be different for everyone. I suggest to try it on before attaching the flutter sleeves. Since I had no experience with sewing a shirt for myself I was a little afraid to go too far away from the pattern.
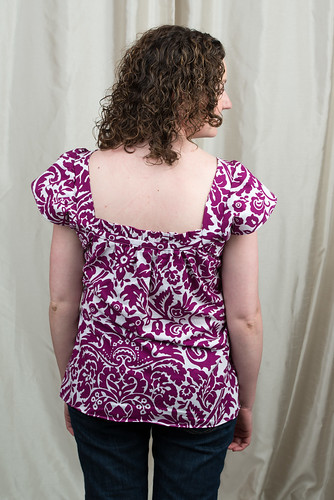
As you can see, the back still lays a little funky. I think it is because I had to take the sides in so much. Some of the ladies in the sew-a-long shirred around the area below the chest or added a belt of some sort to help. I know one lady mentioned taking away some of the fabric from the fold…I think that means since you cut the main piece on the fold, she just moved it over so that it was narrower. I will have to be careful if I do this because, like I mentioned above, the bust fits perfectly.
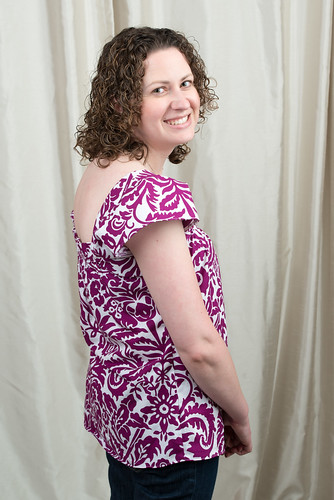
I made mine the shortest length, which I think is perfect for me. I am 5’2” with long legs compared to a short torso. Again, either measure yourself or hold the taped together pattern piece up to you to know the length. Another option would be to cut it longer than you think you need to and then when hemming adjust the length.
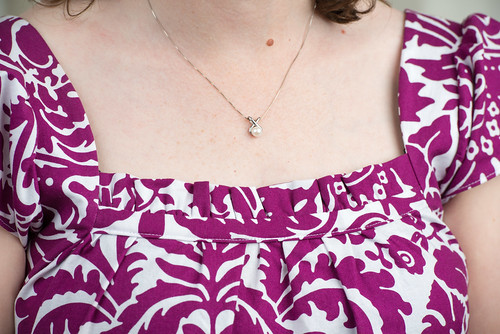
Here is a detailed shot of the top. The back looks exactly the same and is sewn exactly the same. I am still not the best at getting ruffles so that they are even. I know I can ruffle with my serger, but I’m not sure on how to get the perfect ratio, so for now, I will continue to use basting stitches and pulling the bobbin thread to get ruffles.

Overall, this was a fairly easy pattern to make. The instructions were easy to follow, but being a part of the Facebook group also helped for when I got stuck. I’m pretty sure I could have figured it out on my own, but knowing there were more pictures to reference was nice.
Do you have any shirt patterns that you love? If so, please share so I can check them out. This whole sewing clothing thing might become addicting!


2 Responses
it looks great!