Lillian was invited to another daycare friend’s birthday party. This time it was a little boy and being the mom of a girl, I really didn’t know what to make for him. I did know that I wanted to make something though! I did a little research and came up with a superhero cape.
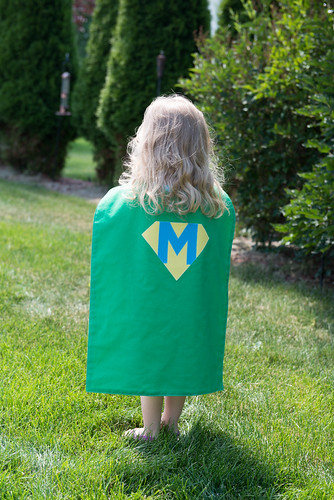
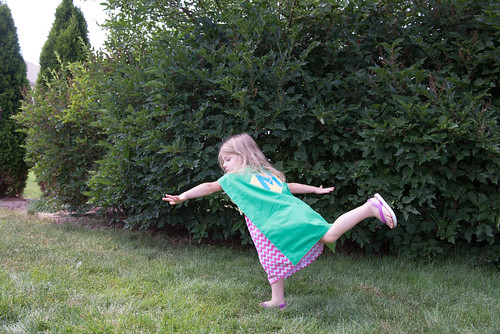
I asked his mom what his favorite color was and you can probably guess that it is green. His name starts with an “M” so I wanted to use the letter on the back to make it even more personable. (Yes, that is Lillian in the pic above and not the little boy!) The only problem I see is that the quilter’s cotton is going to wrinkle and crease easily.
For the shape of the cape, I based it off of this tutorial. I made a few changes so that the shape was more of what I was looking for. I started out the same way by cutting my fabric to an 18” x 27” rectangle and then folding it in half with long edges together. Then on the folded edge I made marks at 1 1/2”, 4”, and 6 1/2” (the same as in her tutorial).
I then took a compass (you know the ones you used in geometry class?) and set it to 2 1/2”. Then put the point at my line that was 4” down from the top; so the middle line. My fabric marker wouldn’t fit into the compass so I had to use the pencil, but instead of marking on the fabric with it, I just made dots with my fabric marker right next to where the pencil was. Then I connected the dots to make the half circle for the neck opening.
Next, I measured 1 1/2” from the folded edge and drew a line from that mark toward the circle that I just drew. This is again the same as the tutorial. I also measured down 10 1/2” inches from the top on the non-folded edge. This mark was to get the shape of the cape, just like in the tutorial, but I actually ended up with a curve that only went down about 9” from the top. This step kind of depends on the look you are going for. At this point, if you wanted rounded bottom corners, you could easily draw a curve at the bottom edge on the non-folded side.
Next it was time to cut out the actual cape. I just needed to cut along the lines that I drew and I had a cape in which both sides were matching. Since I needed a front and back piece, I then used this first piece as my template and cut out the other piece the same exact way. I pretty much used the first one as a stencil and just placed it on top of the other piece of fabric and cut. You could also just trace it and then cut.
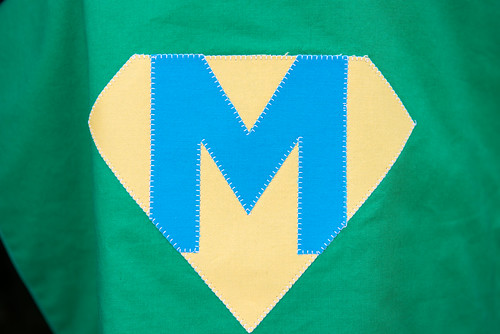
For the “logo” on the cape I searched for a shield on Google images. I ended up finding and liking this one. I then went off of what Whitney used, but didn’t have the same font, so I chose Gotham Bold and used size 400. For the “M”, it fit perfectly inside of the shield, but the size might have to be adjusted for other letters. I did cut off part of the bottom of the “M”, but I like the way that it fit together.
To attach the “logo” I just used Heat n’ Bond Lite (make sure it’s lite, otherwise it’s not sewable!). For a great applique tutorial check out Melissa’s blog Sew Like My Mom. I decided to use a blanket stitch because I like the way it looks, but you could easily use a zigzag stitch.
So I first attached the shield and sewed it on, then the “M”. Once both of those were attached, I was able to sew the front and back pieces together. Since Whitney used felt, which doesn’t fray or unravel, she didn’t need to do any sewing. I used quilter’s cotton so I had to take my two identical pieces and sew them together with right sides facing, leaving about a 3 inch opening in the bottom. I then turned right side out, ironed, and top stitched all the way around the cape. After that, I attached the Velcro, and the cape was done.
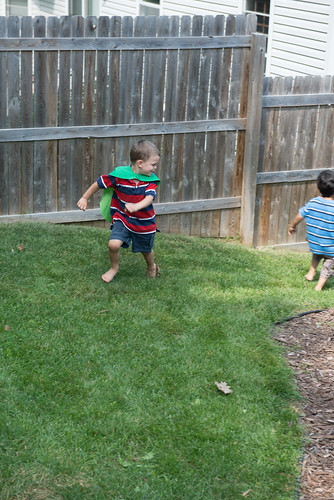
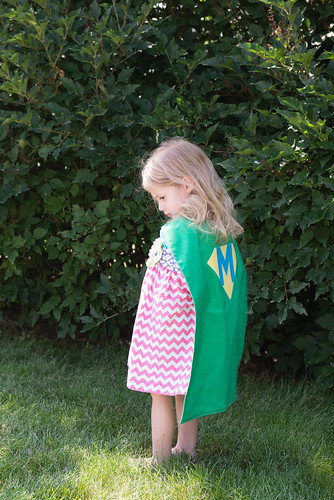
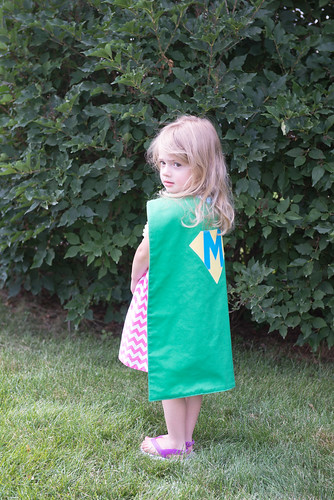
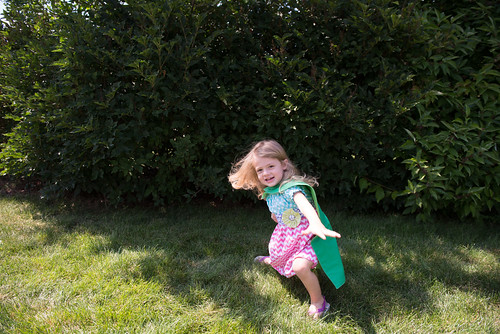
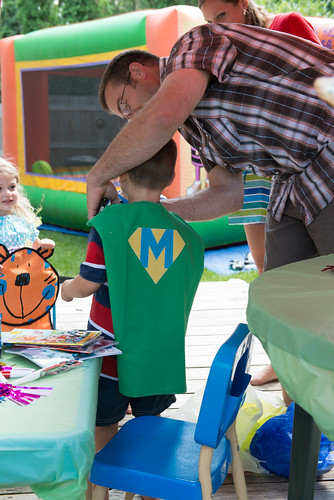
I would say it was a success! As soon as the little boy’s dad put it on him he immediately started running around the yard. Oh, and one other thing about the cape…I made the underside a different green than the side with the “logo” on it. I think it just adds a little something to it.
What have you made for little boys if they aren’t yours and you aren’t sure what to make? The only other boy project I made was the car cozy for our neighbor boy.


2 Responses
Your daughter is just beautiful!! Love the cape. What a great boy gift. I would have never thought of that – its so appropriate for a boy that age. Thanks for the post!
Adecuadamente sûr put gérer le reste cette populace, les fameuses gemmes seront là os quais l’on peut comparer
à l’argent au regard de le lieu réel.