When we bought a new bedding set for our bedroom, we also no longer had pillow shams for a few of the pillows. Not that I’m complaining because the pillows just sat on the floor in the corner anyway. I decided that the pillows (27 x 27) would be perfect floor pillows for Lillian to lay on in the living room. I also decided that I wanted to do an invisible zipper since I knew she wouldn’t pay attention to where she was laying on the pillow and didn’t want her to scrape her head on the zipper.

From researching online, I also decided that I would purchase an invisible zipper foot to make my life easier. Plus, Bernina had a special on feet at that time, so I purchased the invisible zipper foot and a quarter inch foot from my local quilt shop. Both worth the money, by the way.
I also decided to use flannel for both pillowcases because it’s oh so soft to lay on! I used a 23” invisible zipper purchased from zipperstop. You can use any size zipper as long as your pillow will fit through it. I would think it should be at least 3/4 of the length of your pillow. I haven’t tried that out, so don’t take my word for it!
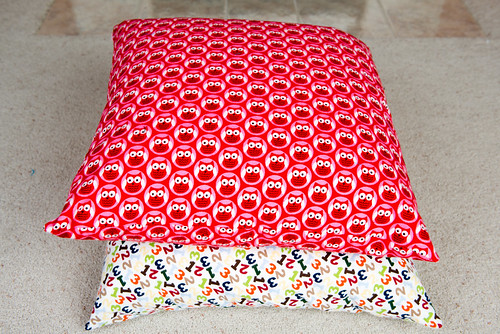
This tutorial is for making a pillowcase using an invisible zipper and the invisible zipper foot. To get started, you will want to determine the size of your pillow. My pillow was 27 x 27, so I cut out two squares 26 x 26. I suggest taking your pillow size and subtracting one or two inches from it in order to determine your pillowcase size. Pillows can be smashed and squished into the pillowcase, so with the smaller size, there is less extra room and it makes for a fuller pillow.
My first one that I made (the 1, 2, 3 fabric), I left the fabric 27 x 27 and the pillowcase looks too big for the pillow, so the owl one I made 26 x 26. It’s much better, but I could have easily made it 25 x 25 and it would still look great.
So now you have two pieces of fabric slightly smaller than your pillow, but the same shape. First make sure that your zipper works, then leave it unzipped all the way. With your fabric right side up, place your zipper right side down and line it up with the edge. You can pin it in place if it’s easier for you, but I found it just as easy to line it up as I sewed. But then again, I rarely use pins.
I used the selvedge edge of my fabric because then I won’t get unraveling right next to the zipper.
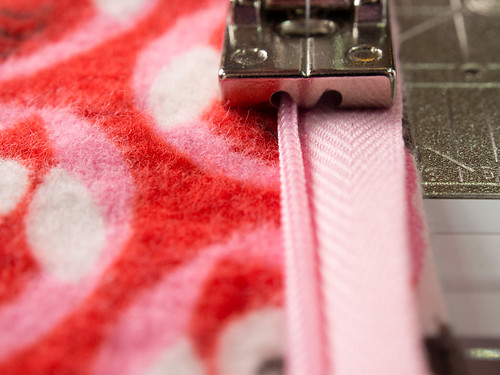
Here is what an invisible zipper foot looks like. All that you need to do is line up one of the openings (it will depend on which side of the zipper you are sewing on) on top of the zipper. Make sure to keep the edge of the zipper tape even with the edge of the fabric and the foot does everything else for you. Yes, it’s literally that easy!
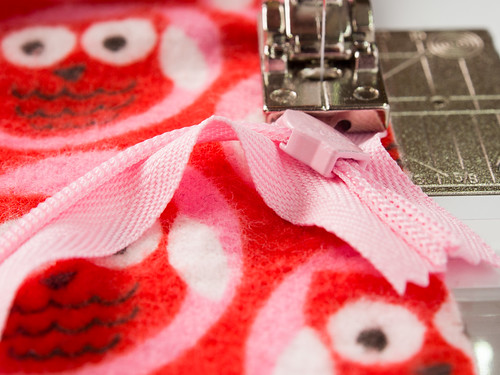
When you get near the end of the zipper, sew as close to it as possible.
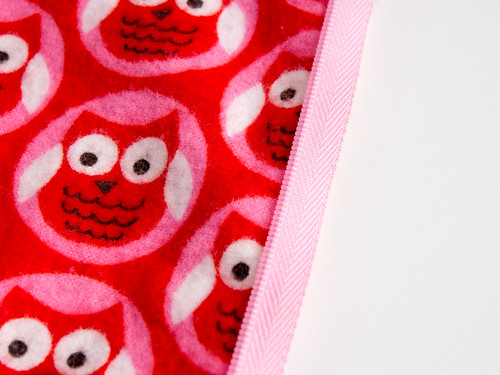
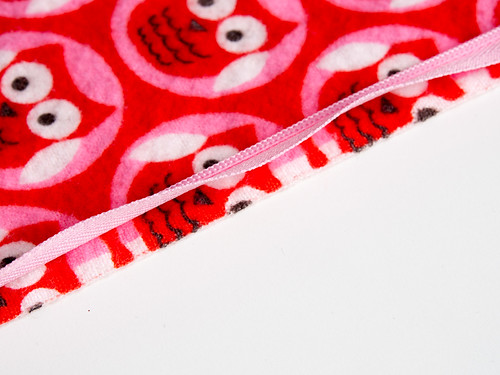
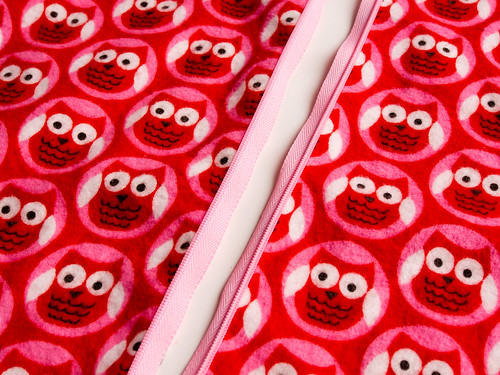
Here is the first half of the zipper after it is attached. You can’t even tell the zipper is attached.
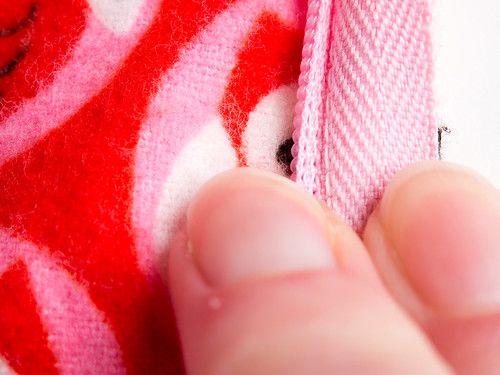
But if you fold open the edge of the zipper you can see the stitches. They are right above my pointer finger (the one on the left), right next to the zipper.

Now it’s time to attach the other side of the zipper. Lay your other piece of fabric next to the first piece. I like to lay my zipper out without any twists, and then move it to where it needs to go. So on mine, my loose zipper piece was originally to the left of the zipper piece that is already attached. Then I knew that I needed the loose piece to be right side down on my second piece of fabric.

It will have a slight twist before you sew it on, but that is because both pieces of fabric won’t be right side up. For the finished pillowcase, one will be wrong side up. This seems confusing, but when you actually have the pieces in front of you it will make sense.
Another way is to put the piece with the zipper already attached, right side down on top of the other piece of fabric. This will automatically make your zipper right side down, so all that you need to do is pin your zipper in place and sew it on.
Now do the same thing as you did with the first side of the zipper. Since we are sewing the opposite side of the zipper, we will use the opposite opening of the invisible zipper foot.
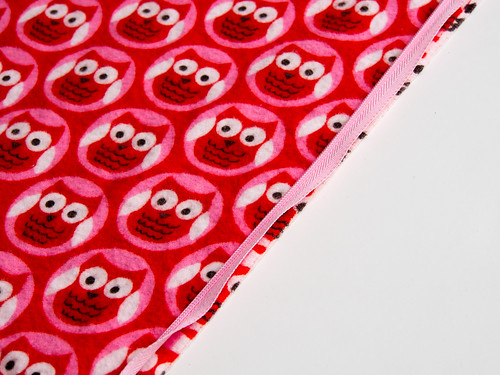
Here you can see both of the zipper tapes are attached to the fabric.
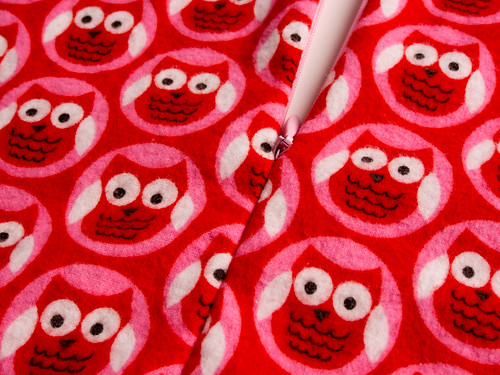
Here is what it should look like when the zipper is closed. You can’t tell there is a zipper there, but when it’s not zipped you can barely see the zipper. I suggest to zip and unzip the zipper to make sure that it works and doesn’t get stuck.

If you know your zipper works, then you can move on to this step. Leave your zipper unzipped, and lay your fabric right sides together. We are now going to sew all the way around the fabric with a quarter inch seam allowance. The trickiest part is getting the zipper out of the way.
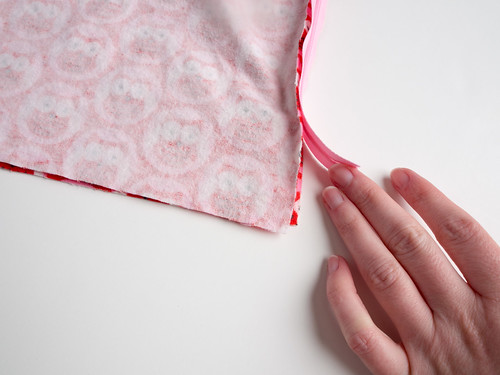
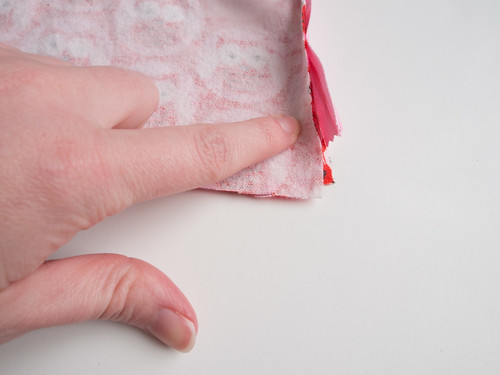
Move the end of the zipper away from the fabric and sew from your previous stitch toward the edge of the fabric. Be sure to continue using a 1/4” seam allowance.
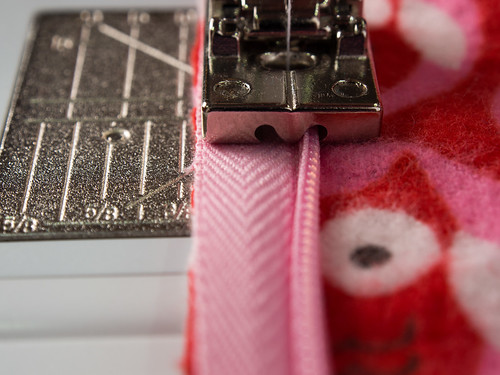
You will start sewing where I am pointing.

Here you can see that the zipper tape is out of the way and I am sewing a quarter of an inch away from the edge. Stitch all the way around until you get back to the other end of the zipper. Do the same thing with moving the zipper tape away from the fabric, and end your stitching when you get to the stitching from when you inserted the zipper.

Here is another picture of the zipper. It amazes me how it doesn’t show up at all other than the zipper pull. Whoever invented an invisible zipper is kind of a genius!
As always, if you have any questions, just let me know!
On a side note….the Sew Fab e-Pattern Sale starts in the morning. If you haven’t heard about it yet, there is a bundle of 18 pdf patterns on sale for only $24.95! It’s truly a great value and there are some awesome patterns included. Check back tomorrow to see what it’s all about and to find out what patterns are included in the sale.


4 Responses
Great tutorial – thank April.
I am still scared shitless about zips. I think I will get a foot like you. I have never heard of a 1/4 inch foot though. What is different about it?