I made the Navigator Pullover from Love Notions and it has you put bias tape on the hood lining in order to have a nicer (non-raw) edge on the inside of the hood. It calls for double fold bias tape, but I didn’t have any, and because it’s a curved edge I knew I would need bias tape and not just regular binding. So I decided to make a knit binding. Here is an example of a Navigator that I made.
Make Your Knit Binding
The pattern calls for 1/2 inch double fold bias tape. So in order to make double fold knit binding, I need to take the final width (1/2″) and multiply by 4 to get 2″. I’m binding a hood, so I measured the edge of the hood to get the length to cut. I then added a few inches to make sure I had plenty of binding. So I know that I need to cut my fabric equal to the length just measured by 2″ for the width. The length should be cut with the stretch of the fabric.
Attach Your Binding
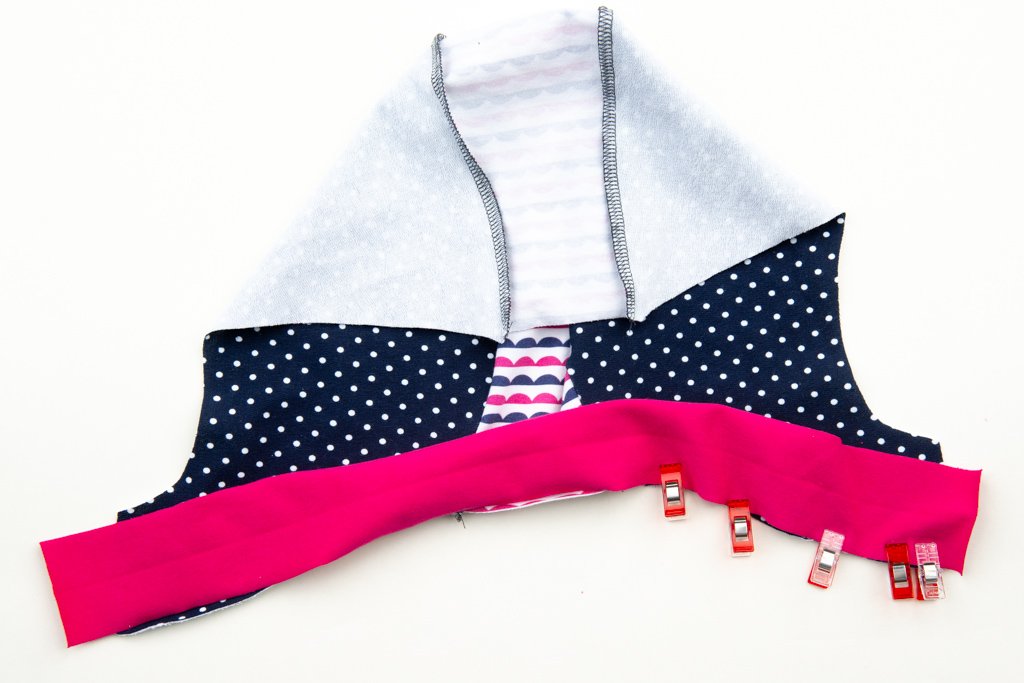
Pin or clip the binding and main fabric right sides together. You don’t want to stretch the binding or the main fabric.
Sew together with a straight stitch using a 3/8″ seam allowance. Honestly, you could probably serge the edge if you wanted to.
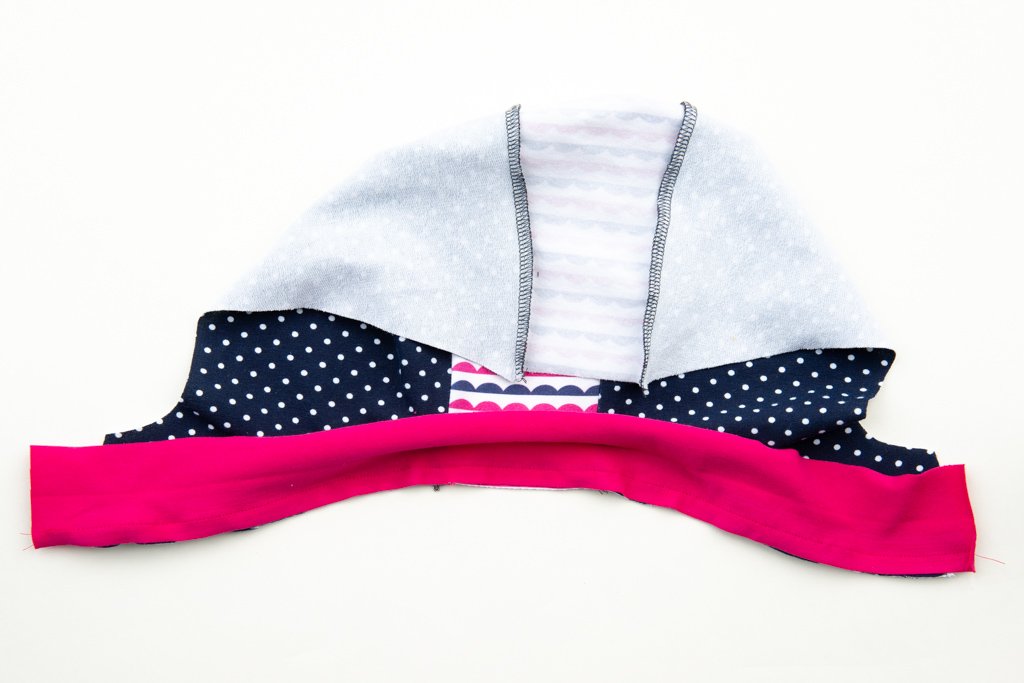
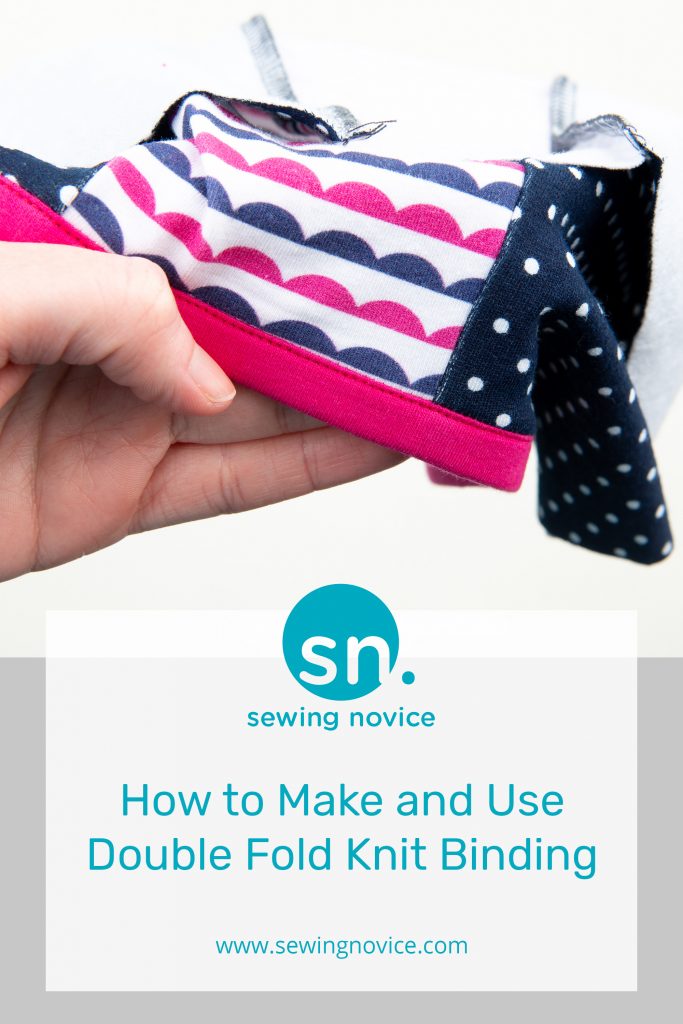
Press the seam from the right side of the fabric, making sure that the seam allowance is facing the binding. So in this picture, the seam allowance would be pressed down toward the pink binding.
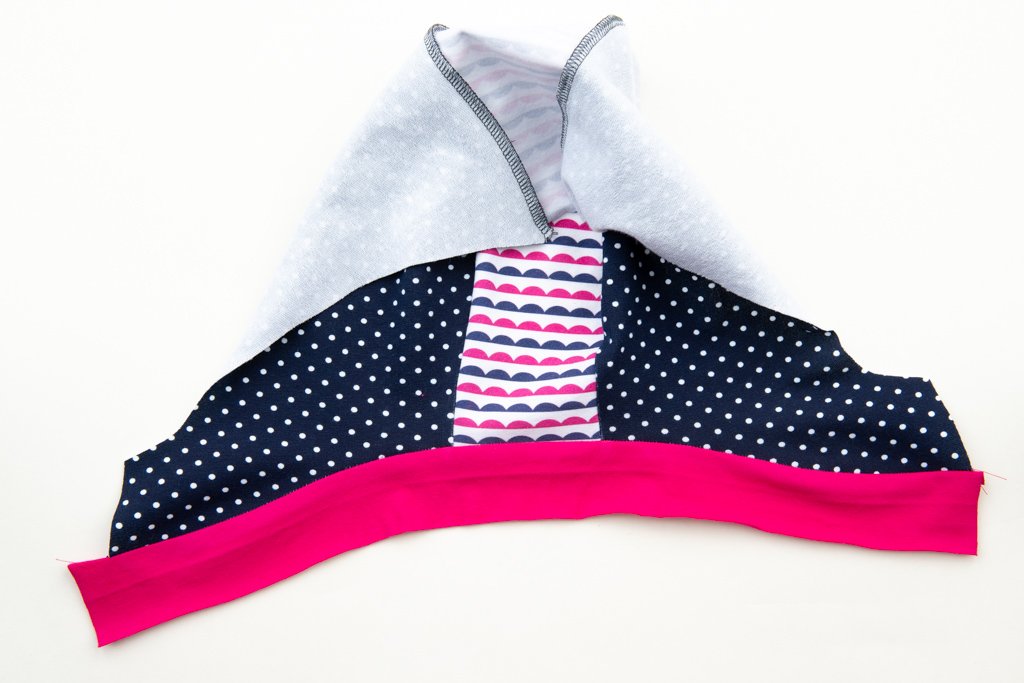
From the wrong side of the fabric and binding, fold and press the raw edge of the binding so that it meets the outside edge of the seam allowance.
Now fold and press the binding over the seam allowance toward the wrong side of the garment, enclosing the raw edge.
Top stitch on the right side of the fabric. Depending on what you are binding, you could also use a coverstitch machine to top stitch.
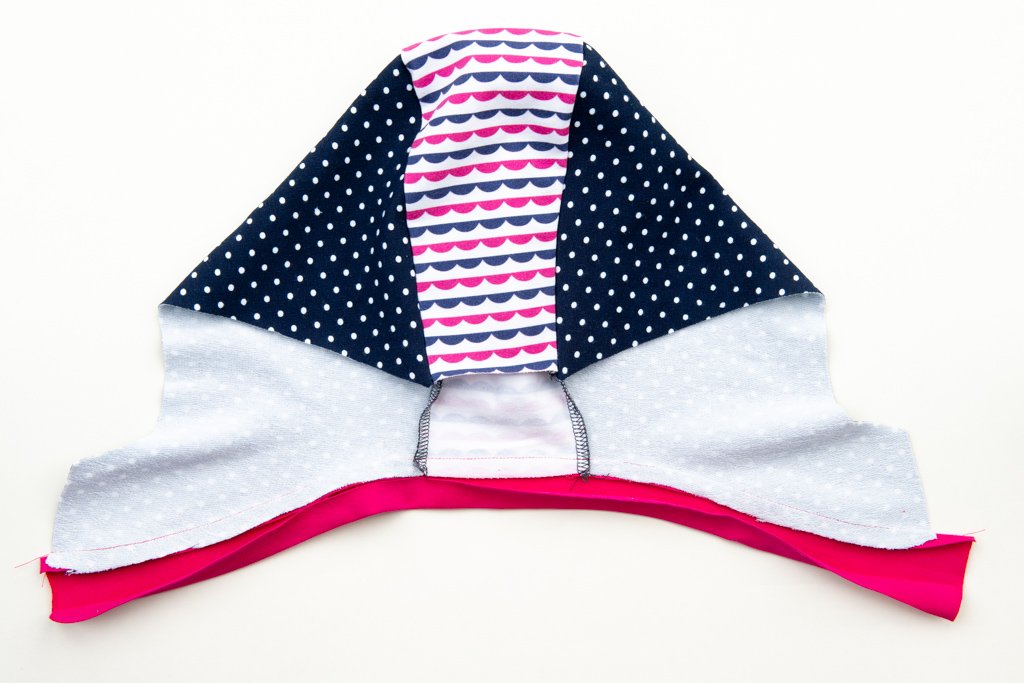
Here is what it would look like from the back. Since it won’t be visible, I wasn’t careful how far from the edge my stitches were on the back. I just wanted the front to look nice.
Share this post
One Response
I have spent days looking online for this information. I wanted to know how to finishe the back of the trim. I also wanted to know the type of fabric to make the bias tape – woven or knit? Your post was a big help. Thanks


One Response
I have spent days looking online for this information. I wanted to know how to finishe the back of the trim. I also wanted to know the type of fabric to make the bias tape – woven or knit? Your post was a big help. Thanks